26. Magento. How to manage Parallax blocks
1 min readIn order to add parallax-effect for certain content block, you need:
- To add any class for parallax-effect block (e.g: parallax) and add attribute:
data-source-url="{{skin url='images/your_image.jpg'}}"E.g:
1<div class=”parallax” data-source-url=”{{skin url=’images/<strong>your_image.jpg</strong>’}}”> </div>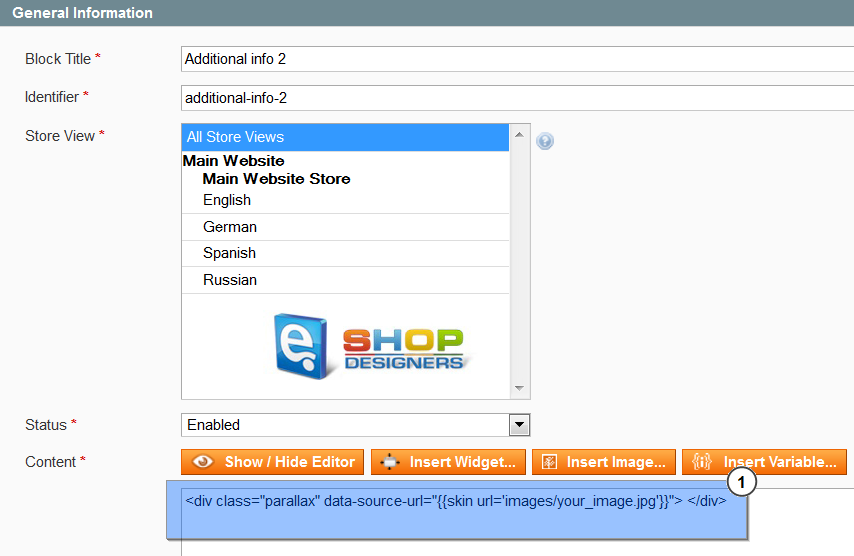
- To add image into images folder skin/frontend/default/themeXXX/images/.
- To add styles into the skin/frontend/default/themeXXX/css/style.css file:
12345678910.parallax {background-image: url(../images/<strong>your_image.jpg</strong>);background-position: 50% 0%;background-repeat: no-repeat;background-size: cover;left: 50%;margin-left: -225px;height: 250px;}
- Add the following code into skin/frontend/default/themeXXX/js/scripts.js file :
12345678910jQuery(window).load(function(){var isMobile = /Android|webOS|iPhone|iPad|iPod|BlackBerry|IEmobile|Windows Phone|WPDesktop/i.test(navigator.userAgent);if(!isMobile) {if(jQuery(“.parallax”).length){ jQuery(“.parallax”).cherryFixedParallax({ invert: true,offset: 300});};};});
Variable invert: true chooses the direction of the parallax effect, and offset: 300 its density:
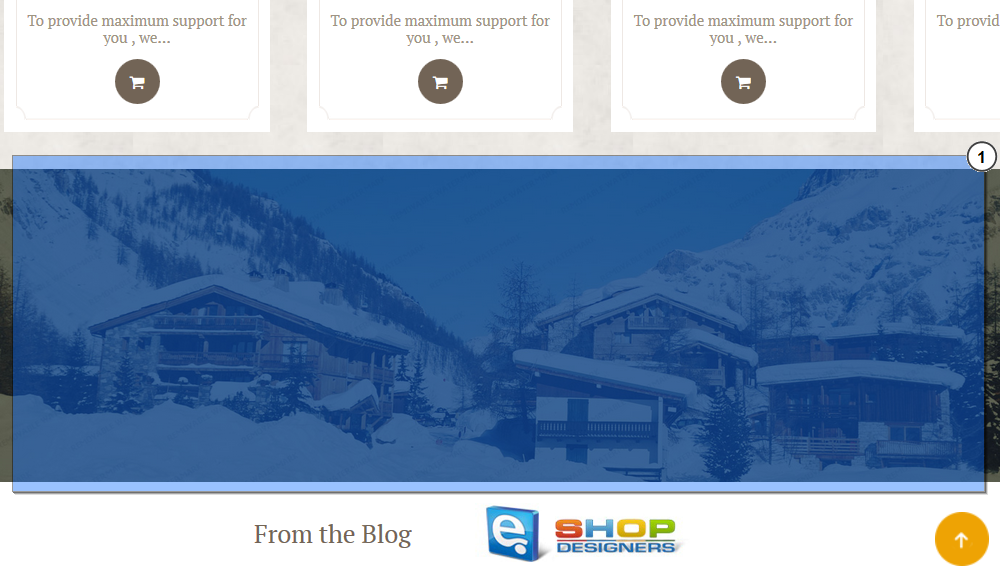
This is the end of the tutorial. Now you know how to manage Parallax blocks in Magento template.