6. Magento. How to set up store view specific settings of Cloud Zoom extension
2 min readIn order to do it, you should perform the following:
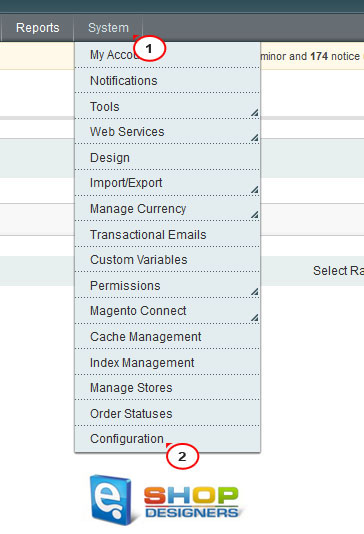
- Log into your admin panel with your login credentials.
- Go to System -> Configuration:
- Open Catalog tab:

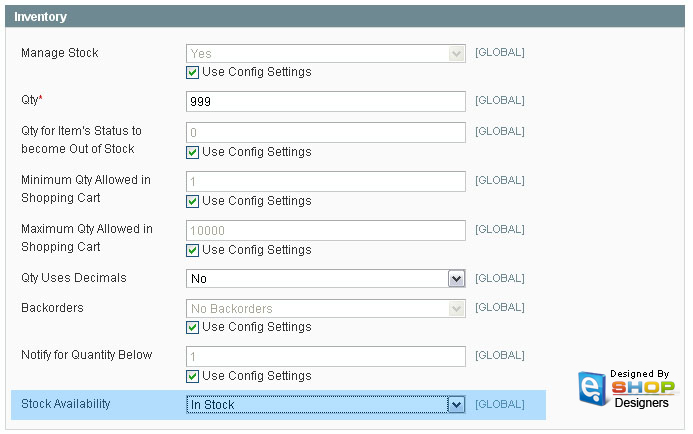
- On the next page under Cloud Image Zoom you will find a list of options to configure the module:
- Enable Cloud Zoom: when ‘yes’ is selected, the option enables the Cloud Zoom in your product images;
- Position: allows to change the Cloud Zoom position on the product images to one of the following: right, left, top, bottom, inside;
- Show Title : allows the product title to appear at the top of the image when you mouse over the Cloud Zoom;
- Title Opacity %: (for inastance, set to 50) allows to change the opacity of the string at the top of the product image which shows the product title;
- Lens Opacity %: (for inastance, set to 50) allows to change the opacity of the lens;
- Zoom Width: (Leave empty for auto) allows you to manually change the zoom width;
- Zoom Height:(Leave empty for auto) allows you to manually change the zoom height;
- Big Image Width: (e.g. 600) allows you to automatically change the width of the enlarged image;
- Big Image Heigh: (e.g. 600) allows you to automatically change the height of the enlarged image;
- Tint Color: (e.g. #aa00aa or leave empty to disable) allows you to specify the tint color for the Cloud Zoom;
- Tint Opacity %: (e.g. 50) allows you to change the tint opacity for the Cloud Zoom.
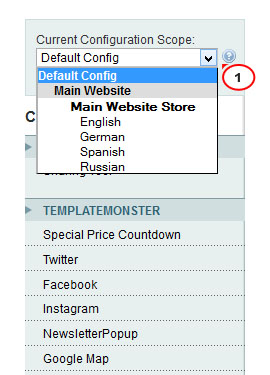
- Select a store view required from a drop-down menu on the top left and click it;
- Change the settings according to your needs and click Save Config at the top right when you are done.
- Open any product to see the changes applied.