11. Magento. How to configure Google+ social login using “LitExtension” extension
1 min readIn this tutorial you will learn how to configure Google Plus social login in Magento template(s):
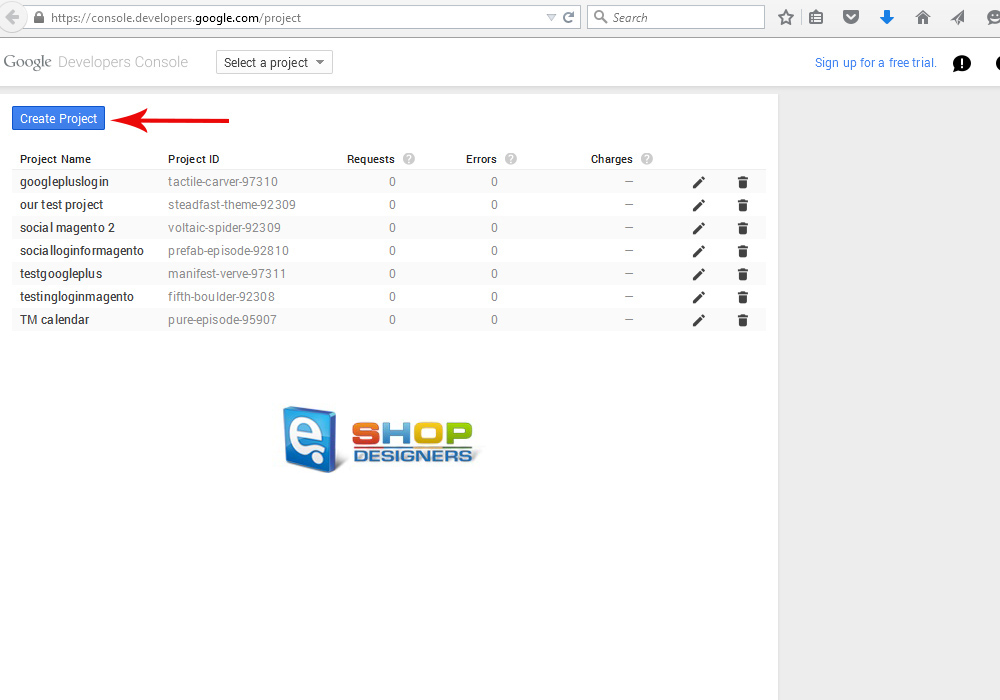
- Go to https://cloud.google.com/console/project.
- Click on Create Project.
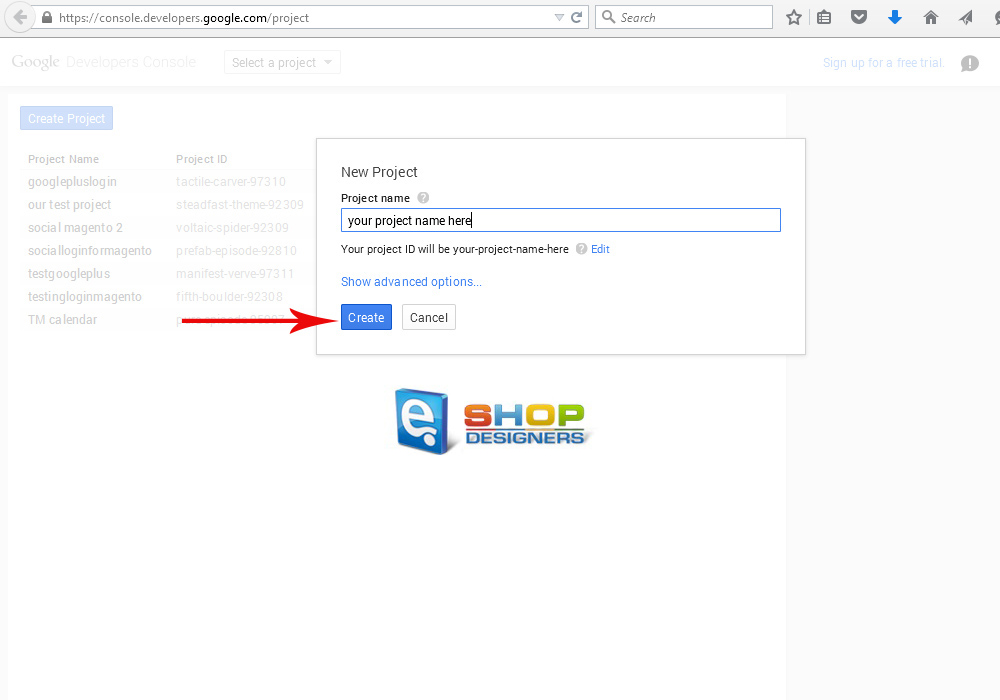
- Enter Project name, Project ID and choose Create:
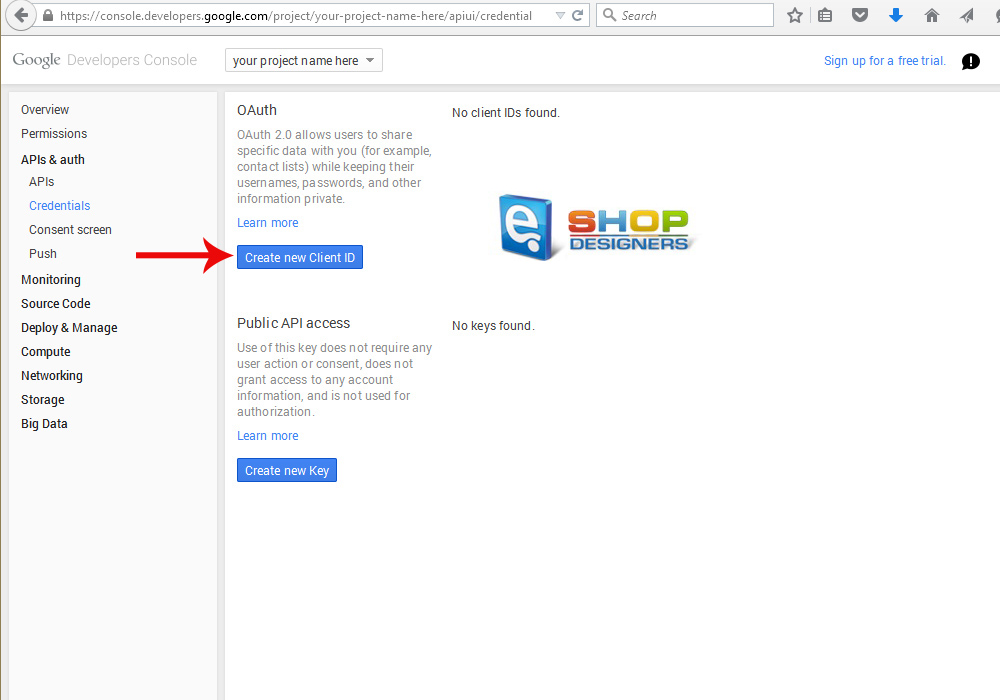
- In next screen choose APIs & auth >> Credentials. Click Create New Client ID.
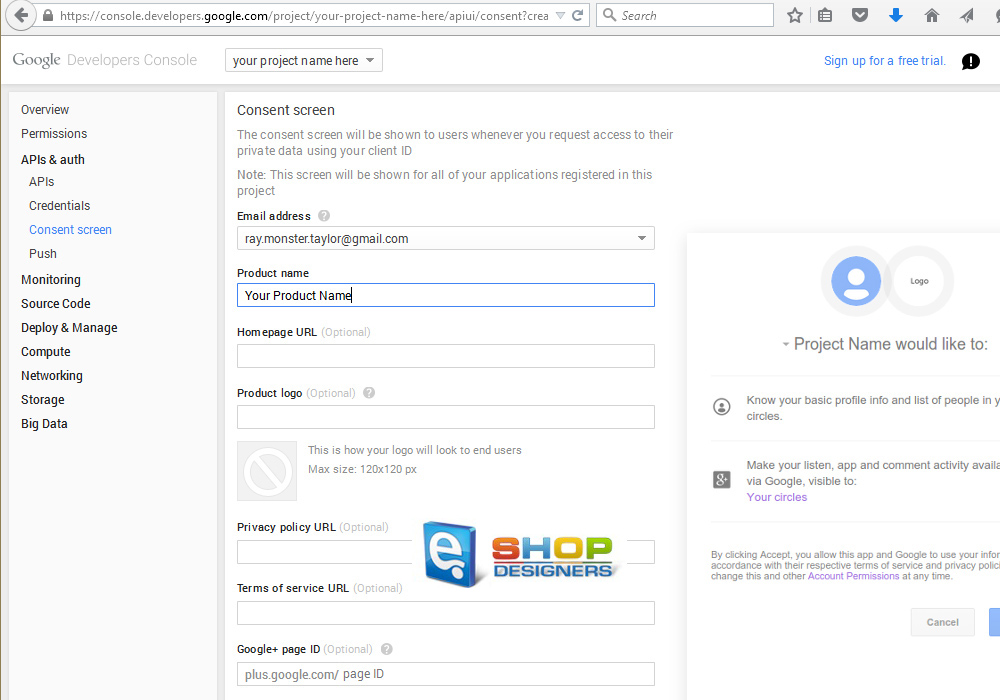
- You may be asked to set a Product Name, then you should click on Configure consent screen button:
- Specify your Product Name and save the changes:
- In the opened windows choose:
Application type: Web application
Authorized Javascript origins: your website url
Authorized redirect URI: your website url + /le_sociallogin/google/connect/(your website url + /ajaxlogin/google/connect/):
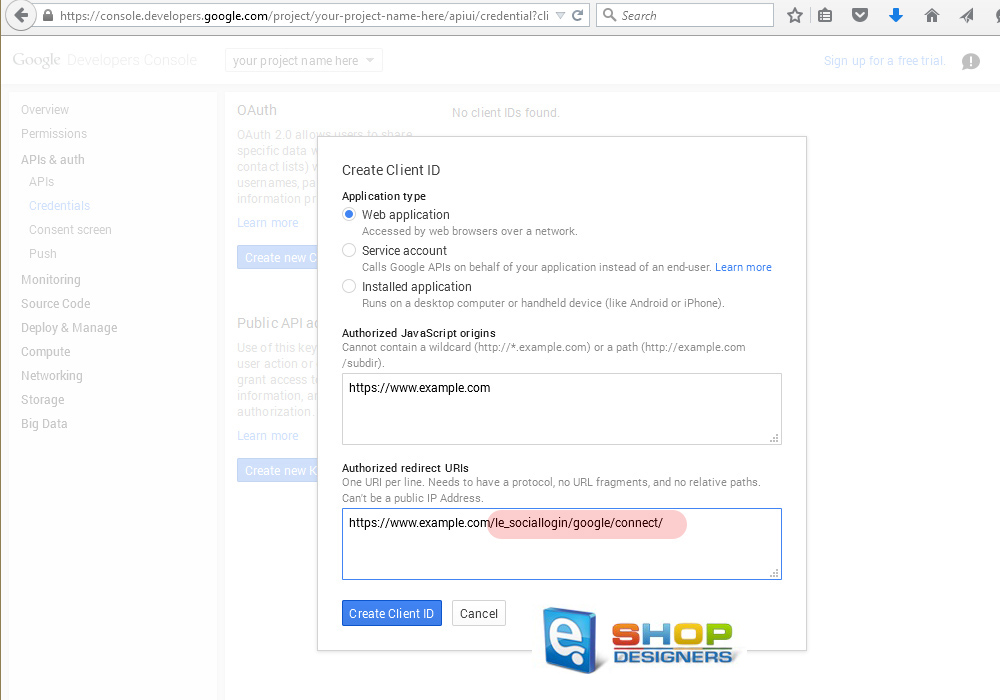
- Note: If you have enabled HTTPS for your login page, you must also use HTTPS for the Authorized redirect URL:
https://youwebsite.com/le_sociallogin/google/connect/
To check that, please navigate to your login page, if it is something like:
https://yourwebsite.com/customer/account/login/, then you are using HTTPS.
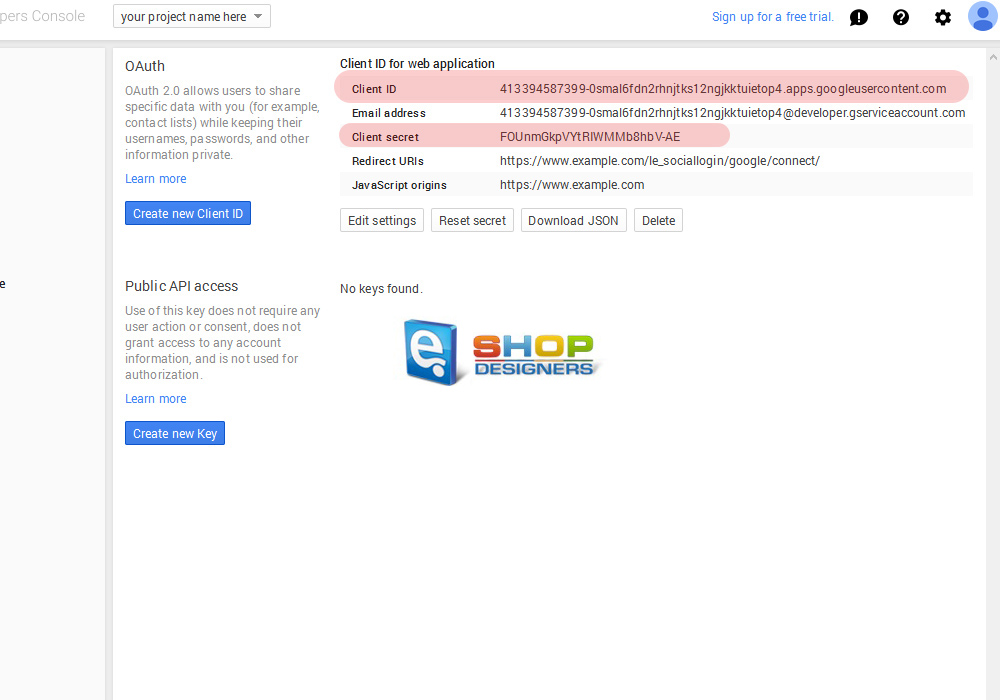
- Now you know your Client ID and Secret:
- Log into your Magento admin panel, go to System -> Configuration -> Social Login > Google Connect Options,
add your Client ID, Client Secret and enable the option.
Thank you for reading this tutorial. Now you know how to configure Google Plus social login in Magento template(s).